Import Links From a Text File
This is a step by step procedure for importing links from a text file. Usually the columns in the file are delimited with commas or tabs, but they can also be fixed width. Each line must contain two sites. A site name and its coordinates must be specified for each site. (Note: if the file contains projected coordinates, The GIS Setup Dialog must first be set to the correct projection on the Site Coordinates tab.)
Example link text file in CSV format:
Site name S1,Site name S2,Latitude S1,Latitude S2,Longitude S1,Longitude S2,TR Antenna Model...
Fairview,Brownvale,55 50 14.00 N,56 04 24.00 N,118 35 48.00 W,117 52 47.00 W,HPX8-58W,..
Brownvale,Peace River,56 04 24.00 N,56 14 11.00 N,117 52 47.00 W,117 15 45.00 W,HPX8-58W,..
Fort St. John,Pine Valley,56 16 33.67 N,56 01 37.06 N,120 53 23.42 W,120 38 09.66 W,HPX8-58W,..
Toms Lake,Demmit,55 39 25.80 N,55 27 43.00 N,120 04 45.70 W,119 53 22.00 W,HPX8-58W,..
Grande Prairie,Beaverlodge,55 12 21.80 N,55 12 50.10 N,118 44 26.90 W,119 16 08.10 W,UHX10-58W (R)...
...
...
Step 1 - Open Text (CSV) File for Import
Click View - Site List from the main menu or press Ctrl+K to bring up the Site List. You can also click the Site list button on the toolbar.

Click Import - Link Text File from the Site List menu or press Ctrl+L. A file open dialog box will appear. Select the text file you would like to import and click Open
Step 2 - Select Text File Format
In this example we are using a comma delimited file with column headers. Select Delimited and, because we do not want to import the column names, set Start import at line to 2.
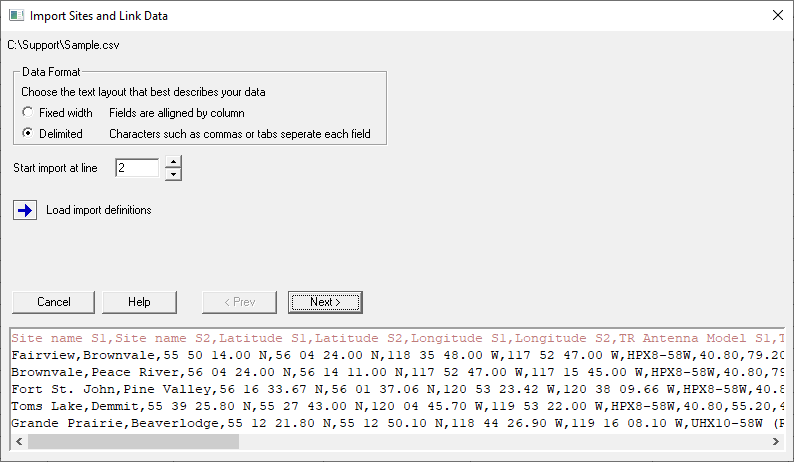
Click the Next button.
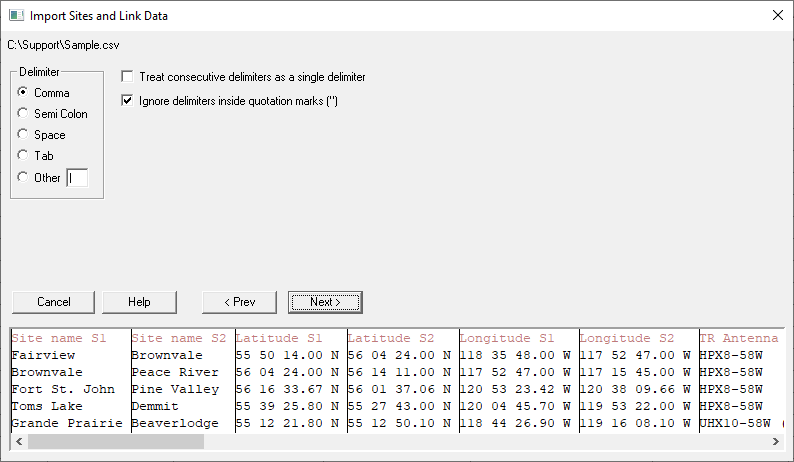
Step 3 - Select Delimiter
Make sure that the delimiter is set to Comma and click the Next button.
Step 4 - Assign Column Definitions
Next, columns will be assigned to the Site or Link parameters that they represent.
Click on a column to select it:
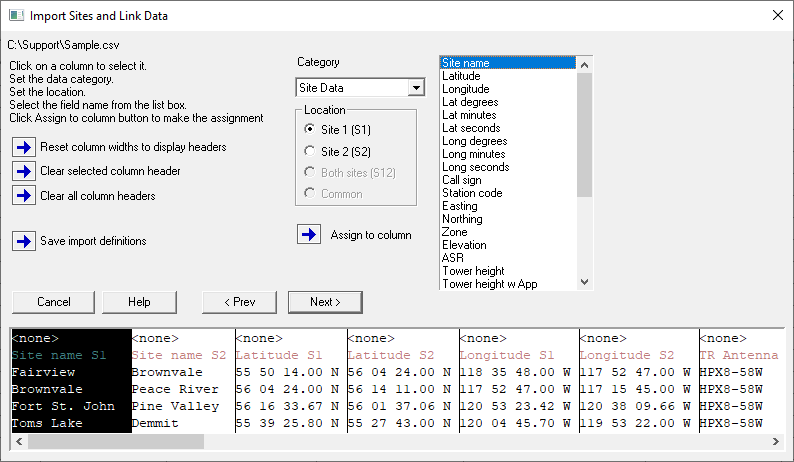
For each column you need to:
Select the appropriate data category and then select the column data type to assign.
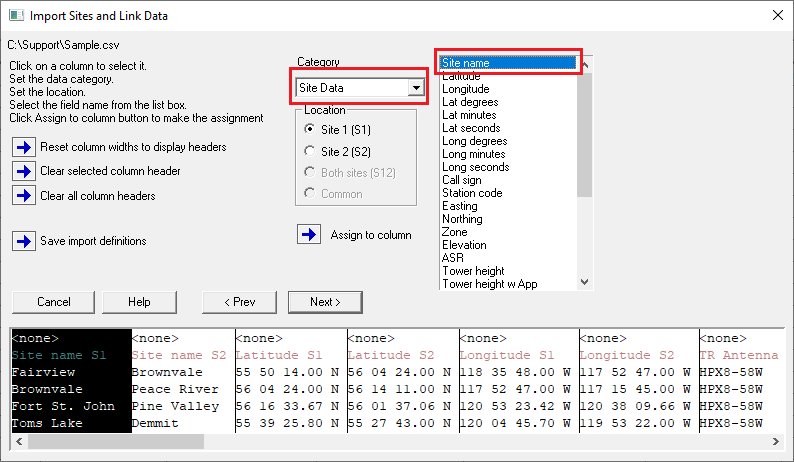
Then set the Location (Site 1 or Site 2, or Both) and click Assign to column.
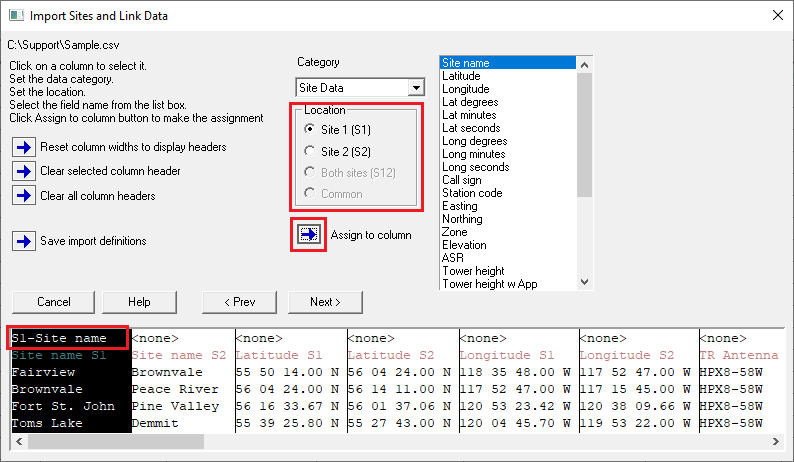
Continue selecting and assigning columns as required to define the format. At a minimum, a link requires 2 Sites where each site has at least a Site Name and Coordinates.
Once all columns have been assigned, you can save the import column definitions to a file. This file can be included with the text(csv) file when sending to other users.
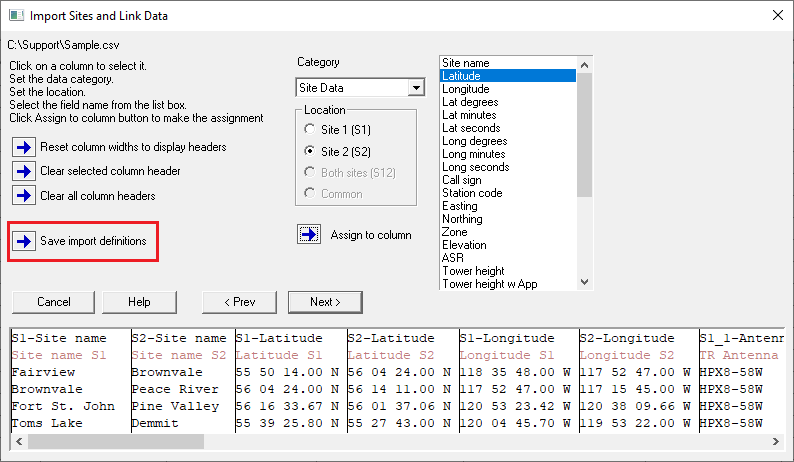
Click Next.
Step 5 - Additional Options and Group Selection
The last panel has a number of settings for units, conventions and defaults that may apply to this particular csv file.
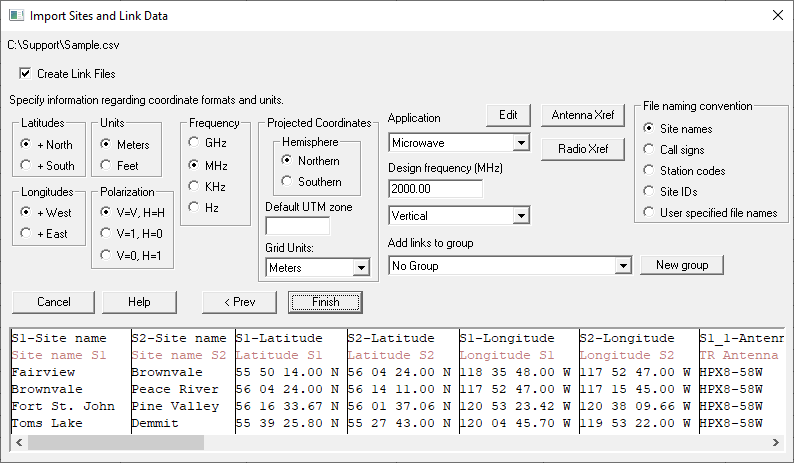
- Create Link Files - If this option is unchecked, the .pl6 link files will not be created. In this case the link will be added to the network but equipment parameters, channel assignments and other values saved in Link Files will not be imported.
- Add Links to group - The imported links can be added to a group. This is independent of the Create Link Files option. Select the group from the drop-down list or click the New group button to create a new group. The name “No group” means that the links will not be assigned to a group. For more on groups see Pathloss 5 - Using groups
- Units - Sets the units used for vertical lengths such as antenna heights
- Latitudes and Longitudes - Specifies the hemisphere for positive coordinate values in the csv file. In our example, the hemisphere is explicitly defined with the coordinates (N and W)
- Frequency and Polarization - Set the frequency units used in the file. If the frequency is formatted to include the polarization e.g 5878.875V, then this will be used; otherwise, select the polarization format used in the file.
- Calculation Options - Click the Edit button to edit the default calculation options that will be applied to the link. The default design frequency and polarization are displayed and can also be set if not defined as part of the import.
- Antenna and Radio Xref (Cross Reference Table) - The import file may not include the antenna data file name. A cross reference can be created between the antenna data file name and some antenna parameter in the import file, such as the antenna model. The text file column should be defined as "antenna data file name" in Step 4.
The import procedure will scan the cross reference table for the model number and substitute the antenna data file name. The antenna data file will be used to set all antenna parameters which are not defined in the import file.
Likewise for radios.
Click Finish. If creating link files, you will then be prompted to select the folder to save the generated link files. Pathloss will then create the links and populate the site and link list.
Bonus Step - Overlapping Link Handling
In the event that multiple rows in the csv file will create an overlapping link, you will be presented with a dialog to resolve the filename conflict.
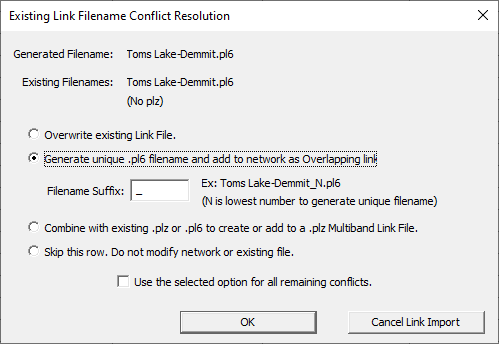
There are four options described as: Overwrite, Overlapping, Multiband and Skip.
- Overwrite - This saves the incoming link as a .pl6 file. The existing .pl6 file is overwritten, or the exiting .plz file is removed.
- Overlapping - This will generate a unique filename for the link by adding a numeral and user customizable suffix. This link will then be added to the network as an overlapping link.
- Multiband - This will combine the incoming link with the existing link as a new band. If the existing link file is a .pl6 file, it will be replaced with a dual band .plz file. If the existing link is a .plz file the incoming link will be added to it as a new band.
- Skip - This will skip this row without adding a link. Exiting files are not modified.
Finally there is a checkbox to use the selected option for all remaining conflicts.
Click OK to continue the import